Sunday, November 4, 2012

Two cakes in two days

Had the opportunity to make a romantic anniversary cake as well as a birthday cake for a little girl. The anniversary cake started out with my super top secret white cake recipe then I added some triple sec, vanilla and almond to replicate the scent of orange blossoms. Romantic,right? I filled the three layers with vanilla bean buttercream and apricot fruit filling flavored with a little triple sec. Vanilla bean buttercream over everything. The recipient has a fondness for the blue sported by a certain local sports team (the Colts) and requested that be worked in to the decoration.
The second cake was a double layer banana cake with strawberry filling. Makes me think of my favorite Jello from kid hood. This cake was graced with the presence of Hello Kitty bringing a birthday cake to someone special. This cake recipe came from Edna De La Cruz of DesignMeACake.com.

Wednesday, October 31, 2012

Pantry challenge

Looking around my kitchen, pantry and freezer I find that we are in danger of collapse. After the disaster in May we did some major shifting of possessions, what was ours became property of the D.A.V. This enabled closet management which resulted in the second walk-in closet becoming food storage. Some summer canning and some bulk buying have filled it. The freezer is full and the kitchen pantry closet is full. Time to use this up. Food snobs and purists turn aside because what we are going to talk about is the stuff of our great grandmothers. Ad these meals will all be built upon each other, with leftovers repurposed not reheated. First dinner- sirloin steak, potatoes, cheese, milk, butter, flour,frozen green beans. Salt and pepper, nutmeg, garlic powder, onion powder. Results:grilled steak with cheeses scalloped potatoes and sautéed green beans. Leftovers- 1/2 lb of steak, half the potatoes, 1/2 c green beans. Saved. Second Dinner- frozen thawed bone in chicken breast, frozen asparagus, Hersey potatoes from previous night. Okay, the potatoes did get a reheat but they were so good who could resist? Chicken was baked with the frozen asparagus in a slow oven. Remove the chicken meat from the bone before serving and slice. Reserve half if the breasts are large. Also had a salad of sliced cucumber with vinegar and oil. Nice mimic between the potatoes and the cakes. Remains: some chicken, 1 1/2 c of potato casserole. Third dinner- remains of the steak, remains of the potatoes, an onion, one carrot, one celery stalk, chicken stock, condensed milk. This became cheesy steak and potato soup. Also whole wheat dinner rolls made in the bread machine. This soup was a ten! Remains for lunch. Fourth dinner- frozen salmon, soy sauce, maple syrup, remaining green beans, frozen broccoli blend and parchment paper. Salt, red pepper flakes and lemon pepper. The vegetables on the bottom, fish on top drizzled with the soy, maple and seasonings. Fold up and bake for thirty minutes. No leftovers. Day five- taco soup. frozen ground turkey, can of pintos, can of black beans, can of corn, can of diced tomatoes, can of Ro-tel box of chicken broth. Chili powder, cumin and ranch dressing mix. Portion remains for lunches. Day six- that chicken from day two. Frozen, thawed broccoli, cooked rice, canned, drained mushrooms, onion, flour, butter, milk and grated cheddar. Salt, pepper, onion and garlic powder, cayenne, dry mustard, nutmeg. Chicken broccoli casserole with rice in a cheese sauce. Day seven- this would be Saturday for me. The remains of the chicken broccoli casserole get put in the crockpot with a can or box of chicken broth. The goal is soup. Keep it warm and eat as desired. Anything left in the fridge gets used today in either a sandwich, omelet, quesidilla or something. The goal for the week was to reuse. I think we did it and I never heard any complaints about leftovers!

Saturday, October 27, 2012

Some recent projects

Time has escaped my grasp!  The garden, with the exception of the swiss chard, has been put to bed for the winter.  That chard won't quit.  We did have a few berries from the relocated strawberries in September but the slugs have been horrid this year.

Lots of cakes and lots of baking.  These two were both for weddings, the smaller one was a bride and groom cake with several hundred cupcakes for the guests.  The second was a large tiered wedding cake for a rustic themed wedding.


small brides cake

large wedding cake
More to come!

Tuesday, August 21, 2012

Repreive from the Heat

We have been having some rain and a reprieve from the heat.  It hasn't been much help to the garden, though.  Tomatoes have stopped ripening and just hang on the vine.  At least the ones that escape the birds, voles and rabbits.  I guess water has been hard to come by for everything.

Last week I weeded the strawberries, crabgrass was taking over.  They rewarded me by setting blossoms and fruit.  Looks like we may get a dozen more berries.  The green beans are coming out today and the bed will be prepped for a new crop.  Maybe turnips.

The okra, which had been thriving in the dry heat is now slowing up and spending more time setting blossoms.  More to look forward to.

I have been baking - made an anniversary cake for my neighbor and a practice cake for my nephews wedding in October.
My neighbor and his wife grow roses and daylilies around their house.  This was their 56th anniversary.
This will become a multi-tier birch sweetheart tree with autumn leaves accenting it.  Not perfect but at least in the right direction.  These are both 6" cakes, which is a perfect size considering how dense and rich they are.  the garden cake was a devils food pound cake with a filling of chocolate fudge, iced in vanilla buttercream lightly scented with orange.  The birch log is vanilla bean sour cream pound cake with a sour cherry filling, vanilla buttercream.  Each cake will make 12 generous slices.


Wednesday, August 15, 2012

Very little thanks to my Garden

Tonight I made Ratatouille.  But I roasted it in the oven.  And I liked it even more than traditionally cooked.

        2 squash - zucchini and yellow is what I used, large dice
        1 Red Pepper, large dice
        1 Eggplant, large dice
        6 small Tomatoes, cored and quartered
        1 Onion, peeled, halved and sliced into quarters
        lots of olive oil
        All the garlic I had
        1 tsp salt
        grinds of pepper

        Preheat the oven to 350 F.
        I started with two stoneware pans.  In each I drizzled a good amount of olive oil.  First pan, squash, eggplant and red pepper, each in its own area.  Second pan, tomatoes and onions.  Smash lightly (crack?) but don't chop the garlic and distribute it between.  Drizzle more olive oil.  Sprinkle generously with salt.  Grind pepper liberally over the top.  Put in the oven.


       If you have a convection oven, use it.  We are going to remove moisture and get some color on everything.  How long?  Until it smells good then a little longer.
       Take the trays out, set them aside to cool.
       Remove the tomato skins if you want.  Scrape everything into a bowl.  Stir and eat.  I like a little Parmesan cheese and some fresh basil.  Someone else likes a sprinkling of red wine vinegar.  Really good on pasta, the penne, not spaghetti.

Monday, August 13, 2012

Tomatoes, tabasco peppers and cake

The drought continues and the birds, rabbits, voles and chipmunks have been using my tomatoes as a water source.  We have resorted to picking them as soon as they show the slightest sign of color and bringing them to the porch to ripen.

The critters are a little pickier with the peppers.  Green bell pepper-fair game, Cajun belle-second choice, jalapeño-hit and miss, tabasco-nary a bite.  Okra stands above the fray and is untouched by all but me.  Pickled two pints for immediate consumption.

Cakes.  I have been having a lot of fun making cakes.  I love to decorate cakes!

The one above is a banana cake with rum buttercream.
 And here we have White almond sour cream cake with strawberry filling and vanilla buttercream.

together they look so cute!


Kitchen experiments

Edible glitter!  Who doesn't want to add some sparkle to your life.  Cake Central featured a small article about it
http://cakecentral.com/recipe/edible-glitter#comment-23991
So I decided to try it.

Not everything you read on the internet is true.
 

Wednesday, August 1, 2012

So much has happened

1. Pipe burst
2. House flooded
3. Had to move to temporary housing
4. Pinched nerve cleaning and packing and moving
5. Return engagement with Orthopedic professional
6. New floors, drapes
7. Unpacking
8. Cleaning

Through it all I have tried to find time to practice my cake craft.  That is because the garden is craft (or a word similar).  Tomatoes are doing well but the entire world population of rabbits has been eating them as soon as they ripen, this after we finally discouraged the birds from eating them. The green beans have been all bush and no bean.  Lettuce - bitter.  No squash or cucumbers.  Even the okra, my mainstay, has been producing at a much slower rate.  The only prolific plant is the Tabasco pepper plant.

I did make blueberry jam from the 5 lbs of Michigan blueberries the store always sells in June.  They were not sweet enough to freeze whole but the jam is very nice, pectin free.

So here are the cakes.

 For my granddaughter's first brownie meeting.

Vanilla cake, vanilla frosting, copyright infringement.


For my Birthday - 4" wee tiny cake.  White almond cake, fresh strawberry and Italian buttercream filling, buttercream then fondant ombre ruffles.


Cardomom spice cake beehive, buttercream caramel frosting.


Dark dark dark chocolate 4" wee tiny cake.  Dark chocolate frosting in a petal design.  Milk chocolate dipped strawberries with a white chocolate drizzle.


Paid commission!! Half sheet, chocolate, peanut free, sports theme.  It has been pointed out to me that the football, though textured nicely to resemble leather has too many stitches.


For my niece.  6" white cake with apricot or raspberry filling.  Fondant overlays.

My Anniversary.  4" wee tiny cake with quilted fondant.
My sister's birthday.  3 layer 6" chocolate fudge cake, dark chocolate and milk chocolate frosting.  White chocolate molded roses, dark chocolate piped roses, dark chocolate beaded scrollwork on the sides.  This one also required structural stabilization because the height exceeded the width.
My grandson's Birthday.  A sour cherry Black Forest Cake with Italian Meringue Buttercream sides and edges. 

Italian Meringue Buttercream is the closest thing to whipped cream I have ever tasted.  It was flavored with vanilla bean so was flecked with the tiny little seeds of goodness.


that brings me up to date.

Sunday, April 29, 2012

The Last Cake Decorating Class

It's over.  I got the certificate of completion and the $400 worth of tools.  And I will miss it.

Making gumpaste flowers is, for me, a very zen experience.  From coloring the paste, to rolling, cutting, forming, wrapping and tinting, everything is relaxing and satisfying.

Here are the results:
My first large flower with some little blossoms
Starting to put together a collection
My first Lilly
The cake for the final class
By this time I have assembled 36 ivy leaves, 24 sweet peas, 3 briar roses, 3 hibiscus, 26 little pink blossoms, 9 hydrangea flowers, 13 stephanopolis flowers and 13 stephanopolis buds, and 2 stargazer lilies.  Dogwoods and 1 yellow lily are for a different project
The spray on the cake

Top view


This was my second application of fondant. I used an 8" layer and a 6" layer, lining them up along the back.  This would create a ledge for the flowers.  Luckily the flowers hid a lot of fondant flaws.

The cake is a lemon/orange sour cream cake, based on the WASC recipe.  I filled it with the same buttercream I used under the fondant, which was made with 50% butter and also flavored with the same lemon/orange combination.  Fondant is vanilla marshmallow fondant slightly tinted with leaf green gel color.

It took two hours to assemble the final spray using every one of my taped and tinted blossoms.  This time also included assembling the stargazer lilies.  One lily is shown in the photos, but I added the second on the top looking towards the back of the cake.

Now I am looking for an excuse to do it again.

Friday, April 6, 2012

More Cakiness

I signed up for another cake decorating class, this one would teach me the basics of fondant and gumpaste.  Unfortunately, I was the only one to sign up for this class and was asked if I would like to move to the advanced gumpaste floral design class.  I agreed then spent the next 24 hours learning as much as I could about basics from the internet.  There is a wealth of information and tutorials available for anyone interested in "cake arts".  My two favorite sources were Cake Central and Edna De la Cruz.  Using what I learned on these sites I prepared a White Almond Sour Cream cake (WASC cake), crumb coated it with buttercream, covered it with home-made marshmallow fondant then decorated it with calla lilies.

This is the cake before the final sparkle sugar
 Step one - prepare the marshmallow fondant.  Knead, wrap and let cool.

Step two - wash the kitchen-aid.

Step three - prepare the cake.  Bake and let cool.

Step four - wash the kitchen-aid.

Step five - prepare the buttercream and set aside.

Step six - wash the kitchen-aid.

Step seven - Color gumpaste and make the pistol for the lilies,  brush with gumpaste glue and roll in sugar.  Set aside.
close up of the lilies. 


Step eight - Roll and cut gumpaste for the lily body.  Form over a cone.  Set aside to dry.

Step nine - insert pistol into the lily body, using a little gumpaste glue at the base.

Step ten - tint, roll and cut gumpaste for the sepal, attaching to the flower with a touch of gumpaste glue.

Step eleven - accent brush the flowers with green shimmer dust.

Step twelve - trim and fill the cake layers.

Step thirteen - crumb coat with buttercream and smooth, smooth, smooth.

Step fourteen - roll out the fondant to 1/16" thickness, transfer to the cake.

Step fifteen - ease the fondant down and around the cake, avoiding creating any creases or puckers at the base.  Trim excess.

Step sixteen - pipe some buttercream for a border and add some leaves on top for the lilies to set in.

Step seventeen - arrange the dried lilies on the top.

Step eighteen - add some more sparkle sugar for punch.

What I learned:
I found that trimming the sides of the cake is very important for a smooth look.  Next time I'm going to use the electric knife.  I did not achieve the sheer verticallity I wanted for the sides.  I also think the fondant drew up as it dried, so I will trim less off the bottom in the future.  Calla Lilies are a great flower to start with, they made me feel almost competent.  Everything is better with sparkle sugar.

Oh, I filled the cake with raspberry fruit spread. 

Tuesday, March 20, 2012

Something Besides Cake Decorating

Thought I would update my unfinished knitting projects.  Just two are underway at this time but I bought ribbon to start a new project.
I wanted to use that Martha Stewart knitting loom, so I set it up to make a shawl.  This is finally one configuration where the pegs stay in place.  Not totally sold on this system.

I have about 4 feet done and would like it to be at least 6 feet, more like seven.  The color has a nice pearl sheen and fades in and out of a light spring green.

The other project is an adult size cardigan using more of that yarn I found on sale.
I am at the first sleeve, which will be added to the body then the yoke knit last.

Last night I adapted a recipe I saw on Ten Dollar Dinners, Food Network.  It was great, quick, easy and crammed with flavor.  The recipe made 4 generous servings and with sides and smaller (hot dog) buns could have easily made 6.  The original recipe is at:
Three Cheese Steak Sandwiches

Here is my adaptation using what I had on hand.

                          Cheesesteak Sandwiches

Serving Size  : 4    


3/4 pound frozen sirloin steak -- partially thawed (or freeze fresh sirloin for 45 minutes)
1 teaspoon chili powder
3/4 teaspoon granulated garlic
1/2 teaspoon salt
1/2 teaspoon pepper
2 tablespoons vegetable oil -- plus more if needed
1 large or 2 small yellow onions -- sliced with the grain
1 red bell pepper -- cut into thin strips
8 ounces mushrooms -- sliced
2 cloves garlic -- minced
3 tablespoons cream cheese
2 teaspoons Worcestershire sauce
2 slices American cheese
4 hoagie/ Sub rolls (the smaller the roll, the more servings)
3/4 cup shredded Co-Jack cheese

Slice the partially frozen meat into very thin slices. Mix together the chili powder,  garlic powder, salt and pepper in a small bowl. Toss the meat slices in the mixture to coat.  Set aside to marinate.

Heat the oil in heavy saute pan (such as cast iron) over medium heat.  I would not use non-stick for this as you want the fond and a pretty high heat for the meat.  Cook the onions and peppers, salting them generously,  until tender and onions are caramelized.  Remove to a plate. Add another teaspoon of oil and the mushrooms and garlic, season this as well and cook until all the vegetables are soft and golden, about 5 minutes longer.

Remove the remaining vegetables to the plate and add a splash more oil to the pan. Raise the heat to medium-high because now it's time to flash-fry the meat. Cook the meat very quickly in the hot pan, stirring to brown all sides. Once brown, reduce the heat (if it was a cast iron pan you can just turn it off)to low and mix together the vegetables and beef. Add the cream cheese, Worcestershire sauce and American cheese, and stir until creamy and well incorporated.

Preheat the broiler to high.

Split open the hoagie rolls and place on a baking sheet. Divide the beef mixture among the rolls and top with the shredded cheese. Broil until the cheese begins to bubble, 1 to 2 minutes. Watch carefully for burning. (Serve with a knife and fork, these are messy)

NOTES : This recipe started with Melissa d'Arabian and her show on FoodNetwork: Ten Dollar Dinners (Episode: Open-Air Fare).  My changes were few - omitted the oregano originally called for and added 2 cloves of fresh garlic in the mushroom saute.  I also subbed Colby-jack for the mozzarella she used because fresh mozz is not a frequent flyer in my house and Colby-jack is.


Thursday, March 15, 2012

Cake Decorating Class #3

that pink really, really stands out
 Lesson #3

Roses.  Not the petal roses but ribbon roses.  And drop and turned flowers.  Sweet Peas and rosebuds.

I started with a 2 layer buttermilk 1-2-3-4 cake.  Something solid to hold up to all that frosting.  I filled it with extra-thick vanilla pudding flavored with Fiora di Sicilia (this is something you just have to try, I can't describe it but it is lovely.http://www.kingarthurflour.com/shop/items/fiori-di-sicilia-1-oz ).  The "buttercream" I flavored with a tiny bit of orange oil and vanilla.


I obviously forgot that color deepens as it ages and that the gel paste colors are very strong.  I meant for the pink to be softer.  But the yellow flowers and the soft green leaves did color nicely, varied from not mixing too thoroughly.

Instead of a shell border at the bottom I used the large closed star tip and made it look more ruffled. 

Here is the recipe for an almost no-fail cake.  I always use White Lily self rising flour.  The lower protein content is closer to pastry flour so the result is lighter.
                                  1-2-3-4 Cake - Revised

  1                cup  butter -- (2 sticks) at room temperature
  2               cups  sugar
  4                     eggs -- Room temperature (warm them in hotish water if cold)
  3               cups  sifted self-rising flour -- Sift then measure
  1                cup  buttermilk
  1           teaspoon  pure vanilla extract

Preheat oven to 350°F.

Using an electric mixer, cream butter until fluffy. Add sugar and continue to cream well for 6 to 8 minutes.

Add eggs 1 at a time, beating well after each addition.

Add flour and milk alternately to creamed mixture, beginning and ending with flour.

Add vanilla and continue to beat until just mixed.   Mix by hand rather than risk overbeating.

Divide batter equally among prepared pans. Level batter in each pan by holding pan 3 or 4-inches above counter, then dropping flat onto counter. Do this several times to release air bubbles and assure you of a more level cake.

Bake for 25 to 30 minutes or until the cake pulls away from the sides of the pan and a tester or toothpick inserted into the center comes out clean .

Description:
  "2 8" layers"


Monday, March 12, 2012

Fluffy Pillows of Yeasty Goodness

Once upon a time and long, long ago in a different universe we would yearn and pine for the day when the high school cafeteria ladies would serve their famous yeast rolls.  This was not a localized phenomena, if you look on the web there are people all over this country with a soft spot in their hearts for the yeast rolls of their childhood school cafeteria.  Sadly, today's kids will never know this yeasty bliss. 

I have tried for years to replicate the ultimate softness and airiness of these remembered rolls.  Today, with the stars in perfect alignment and atmospheric conditions ideal, I reached their lofty peaks.


                    Fluffy Pillows of Yeasty Goodness
Serving Size  : 8     (yeah, right)

  1                cup  water
  2          teaspoons  brown sugar ( I used Sugar in the Raw)
  2          teaspoons  yeast
  1           teaspoon  salt
  2        tablespoons  milk
  3               cups  flour
  2        tablespoons  butter -- melted and cooled

  1. Mix everything in the dough cycle of the bread machine.
  2. When rise is complete, turn out onto floured board and divide into 8 pieces.
  3. Place dough pieces in a greased cake pan.
  4. Let rise in a warm place (I use the microwave) for 40 minutes, until doubled.
  5. Brush with more melted butter.
  6. Bake at 350 for 20-25 minutes.
  7. Remove from oven, brush with more melted butter.  Turn out on wire rack to dry bottoms.

Any remaining melted butter can be added to each roll as it is eaten!

We had these rolls with almost meatless "Crab" chowder.  This is an easy, tasty and inexpensive soup.  I like imitation crab and lobster, it makes a lovely salad with lots of celery and a tiny bit of Mayo.

                              "Crab" Chowder
Serving Size  : 4   
  2             strips  bacon -- diced
     1/2           cup  onion -- diced
     1/2           Cup  celery -- diced
     1/2           cup  red pepper -- diced
  1           Teaspoon  salt and pepper
  1           teaspoon  Old Bay Seafood seasoning
  2               cups  chicken stock
  1                can  evaporated milk
  1                cup  potatoes -- diced
  1            package  imitation crab -- flaked
  2        tablespoons  potato pearls or flakes

  1. Get out a large pot and start rendering the bacon! (This is the almost meatless part)
  2. Add the onion,celery, and red pepper.  Let it sweat.
  3. Now add the stock.  Then add the entire can of evaporated milk and the potatoes. Cover
  4. Simmer, simmer, simmer until the potatoes are soft.
  5. Stir in the fish and bring back to a simmer.  Add the potato pearls or flakes to thicken.  Let simmer for 10 minutes.  Adjust seasoning.
  6. Serve


Saturday, March 10, 2012

Still more cake

Another practice cake.  I've been forced to use the zucchini maneuvers - leaving it on the doorstep, ringing the bell and running - to rid myself of the overage.  And it's all overage as far as my hips are concerned.

I stacked and trimmed all the layers so I had flat sides.

I sprinkled each layer with vanilla simple syrup.

I filled between layers with the Bailey's chocolate mocha butter cream (which is yummy).

I did not use the icing tip, just slathered it on top then sides.  I found that to be easier.

Initial smoothing with a bench scraper, removing excess icing.

Smoothing with wax paper for a smooth and even surface.  At this point it looked almost professional

Decorating.  Practice with shell border, piping lines, leave tip, open star, closed star.

I like the fringe effect from jamming the stars together
Eating.

Friday, March 9, 2012

Cake Desecration 101- part Two

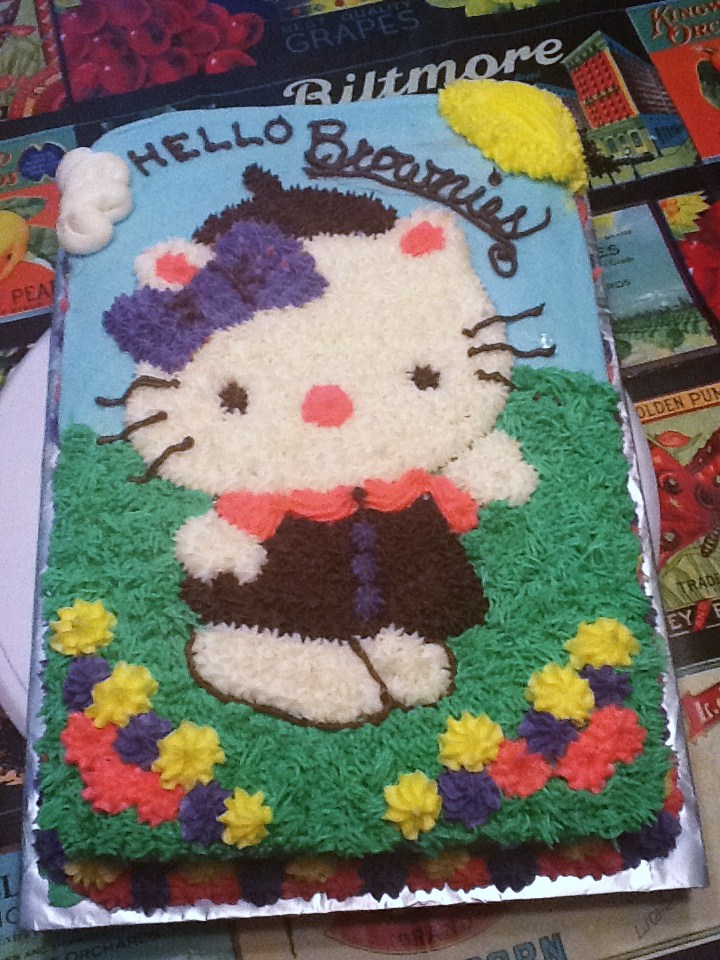
I had my second decorating class.  We were to use a transfer pattern for the top of the cake, shell border along the bottom and the rest was up to us.

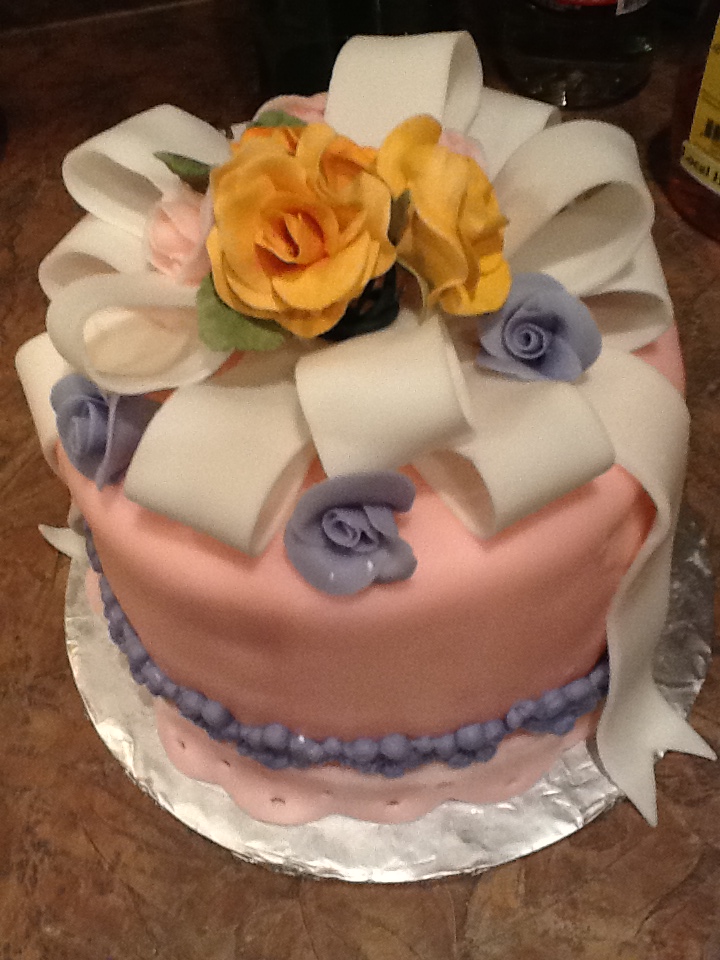
Despite my knowledge of the color wheel and perusal of many color schemes on my Pinterest pages, I succumbed to the pretty colors in the little jars and ended up with a lavender, light green and cream cake.  That purple tint was too hard to resist and the little flowers looked so springlike, kind of like little violets.  With more petals.  And not as purple.  Okay, they didn't look like violets.

My daughter pointed out that the cupcake was running over on one side.  Just like my cupcakes  usually turn out!

See the clever ribbing on the cup part?  Our instructor showed me how to do this using a rose tip and a leaf tip.  The white cupcake part is using the multi-tip that makes grass like strands.


I had to pick the one spot with cake showing through to photograph.   At least it's blurry.


Oh, the cute little purple flowers.  The color did get darker as the evening progressed.  It started out lavender.  You can see a bit of the shiny gel from the transfer


This was a yellow cake recipe from Cook's Illustrated.  I used a single layer for the class, splitting it and filling it with some nice quality strawberry preserves.

                         Fluffy Yellow Layer Cake


  2 1/2           cups  cake flour -- plus extra for dusting pans
  1 1/4      teaspoons  baking powder
     1/4      teaspoon  baking soda
     3/4      teaspoon  table salt
  1 3/4           cups  sugar (12 1/4 ounces)
  10       tablespoons  unsalted butter -- (1 1/4 sticks) melted and cooled slightly
  1                cup  buttermilk -- room temperature
  3        tablespoons  vegetable oil
  2          teaspoons  vanilla extract
  6              large  egg yolks -- room temperature
  3              large  egg whites -- room temperature

Adjust oven rack to middle position and heat oven to 350 degrees. Grease two 9-inch-wide by 2-inch-high round cake pans and line bottoms with parchment paper. Grease paper rounds, dust pans with flour, and knock out excess. Whisk flour, baking powder, baking soda, salt, and 1 1/2 cups sugar together in large bowl. In 4-cup liquid measuring cup or medium bowl, whisk together melted butter, buttermilk, oil, vanilla, and yolks.

 In clean bowl of stand mixer fitted with whisk attachment, beat egg whites at medium-high speed until foamy, about 30 seconds. With machine running, gradually add remaining 1/4 cup sugar; continue to beat until stiff peaks just form, 30 to 60 seconds (whites should hold peak but mixture should appear moist). Transfer to bowl and set aside.

Add flour mixture to now-empty mixing bowl fitted with whisk attachment. With mixer running at low speed, gradually pour in butter mixture and mix until almost incorporated (a few streaks of dry flour will remain), about 15 seconds. Stop mixer and scrape whisk and sides of bowl. Return mixer to medium-low speed and beat until smooth and fully incorporated, 10 to 15 seconds.

Using rubber spatula, stir 1/3 of whites into batter to lighten, then add remaining whites and gently fold into batter until no white streaks remain. Divide batter evenly between prepared cake pans. Lightly tap pans against counter 2 or 3 times to dislodge any large air bubbles.

Bake until cake layers begin to pull away from sides of pans and toothpick inserted into center comes out clean, 20 to 22 minutes. Cool cakes in pans on wire rack for 10 minutes. Loosen cakes from sides of pans with small knife, then invert onto greased wire rack and peel off parchment. Invert cakes again and cool completely on rack, about 1 1/2 hours.

Description:
  "Makes two 9-inch cake layers. Published March 1, 2008. From Cook's Illustrated."
                                    - - - - - - - - - - - - - - - - - - -

NOTES : Nonstick cooking spray can be used for greasing the pans (proceed with flouring as directed). Bring all ingredients to room temperature before beginning. Frost the cake with our Foolproof Chocolate Frosting (see related recipe) or your favorite topping.


Tuesday, March 6, 2012

Cake Desecration 101

I attempted my first decorated  desecrated cake.  This is not as easy as it looks on TV. 

First problem:  How do you keep the layers from falling when the instructions say to rotate halfway through baking?  They fell so I ended up with swayback layers.  The Icing edging to keep the filling from leaking out the sides made this even more evident.
What's with the knot on the left?

Second problem:  Crumb coat is supposed to seal in crumbs, not create a bunch of them.


Third problem:  The graceful drizzle ended up looking like a serious Julia Child and the chicken moment.  I spread it out with the back of a spoon so it wouldn't look so macabre,

and I did a lovely job spreading it evenly, I see.  Well, just sprinkle on some slivered almonds to distract from that.

I did pipe along the bottom to close in the gap between the cake and the board.  Unfortunately I didn't make a nice shell border at the bottom as I did at the top.  The top border doesn't look too bad for a first attempt.

I used the recipe for The White Lily Almond Cake.  I ground up about 1/2 cup of whole almonds to put in the cake.  The filling is just raspberry fruit spread.  The icing is flavored with vanilla and almond. 

The instructor at the Wilton class (first one was last week) said that I needed 6 batches of Icing for our next class on Thursday.  I found that hard to believe.  No longer.  This was one batch of icing, I did not have enough to frost the crumb coat or to add any other decorations.  A shell border at the bottom would have used up everything before I even got to the top.  And this was a single 8" square layer. 

Good thing I have a large Kitchenaid.

Saturday, March 3, 2012

Sugar, sugar

March 1st I started a Wilton Basics decorating class.  One of those things I thought I'd like to get better at since every time I use a piping bag I end up with more frosting on me and in my hair than on the baked goods.

First night we learned basic piping bag filling, holding and squeezing.  This resulted in more frosting on me than on the baked goods.

The next day I practiced on some more cookies.  I finally got a little more on the baked goods than on me!
sugar cookies with raspberry filling

I did one dozen of these cookies, each 4" across.  I tried three types of piping bags; disposable, lightweight vinyl and vinyl coated linen.  The vinyl coated linen bag was extremely hard to squeeze and really tiring.  But it is really durable and can be washed easily.
Sunflower
Next week we frost and decorate a single layer cake.  I need to make 6 batches of decorator (shortening flavored) icing.  15 cups of frosting.  All for a single layer cake.  That should be good.

Monday, February 27, 2012

This is a crime in all 50 states

                     
I am sharing this recipe with deep shame and utter disregard for all things healthy.  At 50.4% fat calories there is little I can do to justify it.  But this is Man Food with capital letters.  I would have included a picture but as soon as it came out of the oven it was gone.

                       Bacon Tomato Mac and Cheese - 4 servings at your own risk.

  2               Cups  macaroni -- cooked and drained
     1/4         pound  bacon -- diced
  1              small  onion -- diced
  3        tablespoons  flour
  3               cups  milk
  8             ounces  cheddar cheese -- grated
     1/2           cup  chicken broth
     1/4      teaspoon  cayenne
  1           teaspoon  salt
     1/4      teaspoon  garlic powder
  1           teaspoon  Worcestershire sauce
                        black pepper -- to taste
                        Slow Roasted Tomatoes -- 1/2 recipe

Cook the macaroni halfway.  Drain and set aside.

Brown bacon in a large saucepan.  Remove bacon bits.

To fat in pan add onions.  Sweat until translucent.

Add Flour.  Cook several minutes.

Whisk in milk.  Add seasoning.

Dice the roasted tomatoes and add, along with any juice.

Mix macaroni into sauce.  Turn out into a sprayed casserole.  Sprinkle top with bacon bits.

Bake at 350 for an hour.

Per Serving (excluding unknown items): 780 Calories; 44g Fat (50.4% calories from fat); 38g Protein; 59g Carbohydrate; 3g Dietary Fiber; 108mg Cholesterol; 1545mg Sodium.  Exchanges: 3 Grain(Starch); 3 Lean Meat; 1 Vegetable; 1/2 Non-Fat Milk; 6 1/2 Fat; 0 Other Carbohydrates.

                           Slow Roasted Tomatoes

  8                     Roma tomatoes -- halved
2         Tablespoons extra-virgin olive oil
                        Kosher salt and freshly ground black pepper

Preheat the oven to 275 degrees F.

Place the halved tomatoes on a baking sheet. Drizzle with the olive oil and sprinkle with salt and pepper. Toss to coat well. Place the tomatoes cut-side down, and cook for 2 hours.

When cool, remove the skins. Eat half as a side with a simple broiled chicken breast and reserve the other half. this lighter dinner will help offset the damage done by the subsequent meal.

Cupcakes' Simple Perfection

My daughter and granddaughter have me hooked on cupcake wars.  The incredible combinations, the over the top decorations, the french guy that I can't understand but who sounds so suave.

My cupcakes aren't like that.

My cupcake is:
Of course, it was this times 36 so:
They marched relentlessly across the table.  I knew I had to do something.  So I ate one.

I had downloaded the recipe for frosting from Ree Drummond - the Pioneer Woman  months ago.  But watching her show on Saturday and seeing it being made tipped the scale for me. (Several other things tip the scale but that's another discussion, not a good one.)

For the cake it had to be chocolate and the best, very best, most totally best chocolate cake I know that is both easy and delicious is Hershey's.
                     

            HERSHEY'S "PERFECTLY CHOCOLATE" Chocolate Cupcakes

  2       cups  sugar
  1 3/4 cups  all-purpose flour
     3/4 cup  HERSHEY'S Cocoa
  1 1/2 teaspoons  baking powder
  1 1/2 teaspoons  baking soda
  1       teaspoon  salt
  2       eggs
  1       cup  milk
     1/2 cup  vegetable oil
  2       teaspoons  vanilla extract
  1       cup  boiling water

Heat oven to 350°F. Grease and flour two 9-inch round baking pans.

Stir together sugar, flour, cocoa, baking powder, baking soda and salt in large bowl. Add eggs, milk, oil and vanilla; beat on medium speed of mixer 2 minutes. Stir in boiling water (batter will be thin). Pour batter into prepared pans.

CUPCAKES: Line muffin cups (2-1/2 inches in diameter) with paper bake cups. Heat oven to 350°F. Fill cups 2/3 full with batter. Bake 22 to 25 minutes. Cool completely. Frost with "PERFECTLY CHOCOLATE" CHOCOLATE FROSTING.

About 36 cupcakes


                  That's the Best Frosting I've Ever Had
Courtesy of  thepioneerwoman.com/

  5 Tablespoons  Flour
  1 cup  Milk
  1 teaspoon  Vanilla
  1 cup  Butter
  1 cup  Granulated Sugar (not Powdered Sugar!)

Bake your favorite chocolate cake and let it cool.  

In a small saucepan, whisk flour into milk and heat, stirring constantly, until it thickens. You want it to be very thick, thicker than cake mix, more like a brownie mix is.  Remove from heat and let it cool to room temperature. (If I'm in a hurry, I place the saucepan over ice in the sink for about 10 minutes or so until the mixture cools.)  It must be completely cool before you use it in the next step.   Stir in vanilla. 

While the mixture is cooling, cream the butter and sugar together until light and fluffy.   You don't want any sugar graininess left.  Then add the completely cooled milk/flour/vanilla mixture and beat the living daylights out of it.  If it looks separated, you haven't beaten it enough!  Beat it until it all combines and resembles whipped cream.

I piped this using a large star tip because I want to learn to decorate cakes, not my face, hands and hair. (But that, too, is another story)

And this was THE BEST FROSTING I'VE EVER HAD!!!

Tuesday, January 17, 2012

36 rolls of TP, 10 pounds of cheese and a bag of dove chocolate

We grilled steaks a week ago Sunday.  Snow last Thursday.  60 degrees today, warm, windy, thunderstorms, tornado warnings.  18 degrees expected for tonight.  55 degrees next Sunday. 


So, we will probably get slammed soon.  In anticipation I did the blizzard stock up - 36 rolls of TP, 10 pounds of cheese and a bag of dove chocolate.  Probably should stash a few bottles of wine as well.


Kroger was sampling Aidell's Sausages when I went in with Nate to pick up a few things.  He sampled each one, even the Andouille, which I warned him about.  I did pick up a garlic sausage that will be perfect for this Cassoulet style dish.

                      Pork Sausages with White Beans

Serving Size  : 6 
6        tablespoons  unsalted butter
2             ounces  bacon -- diced
1 1/2   cups  onion -- finely chopped
3         cloves  garlic -- minced
1/2      teaspoon  thyme leaves -- dried
1/2      cup  dry white wine
1 1/2   cups  diced tomato -- 14.5 oz can
1 1/4   cups  chicken stock
29       ounces  white beans, canned -- 2 cans, drained and rinsed
2         pounds  cooked pork sausages
5         cups  homemade bread crumbs -- 1/2" pieces (coarse)
1/4      cup  parsley -- chopped
  1. Preheat oven to 325
  2. Melt 2 Tablespoons of butter in a large braising pan, add bacon and cook until crisp.
  3. Add onions, cook until tender.  Add garlic and thyme, sweat 1 minute.  Add wine, cook 1 minute.
  4. Add tomatoes and cook until the sauce is thickened slightly. 
  5. Add the stock and bean, bring to a simmer.
  6. Add sausages and Bake in oven for 30 minutes.
  7. Toast breadcrumbs in the remaining butter in a clean skillet.  Add parsley and season with salt.
  8. Scatter breadcrumbs over the sausage mixture.  Broil, if desired for 1-2 minutes.
I have made this with chicken thighs (cooks covered in the oven for about an hour) and with regular smoked sausage.  Even better is chicken thighs with a little smoked sausage. But with the Aidell sausages this should be great.

Sunday, January 8, 2012

New Year, New Me

Just kidding - same old me!


Today was "put everything in the attic that could possibly go up there especially everything to do with Christmas" Day.  So that is done.  There may be some holiday foods still hanging about but Tuesday is trash day and that will be the end of them, except for that box of Lindt truffles.

Knitting is currently baby stuff.  I have a blanket in basketweave stitch on the needles at the moment.

Cooking - after finally getting rid of all the ham and turkey, dressing, cranberries, sweet potato souffle and pie we have gone back to simplicity.

Broccoli cheese soup
No Knead bread that I can't help kneading
Roasted carrots, onions and sweet potatoes
Orange and grapefruit salad
Steel cut oats
Oatmeal scones

Okay - I'll admit the oatmeal scones are not health food, but they pack a lot of fiber in return for all their fat.  And the Broccoli Cheese soup, again fiber for fat.  And I didn't use cream, just half and half and butter.  And sharp cheddar.

the soup:
I started with the recipe from Ree Drummond's website, ThePioneerWoman.com.  But I read on America's Test Kitchen that cooking the broccoli slowly for a long time would get rid of the stinky factor.  And I personally needed to add onion powder, garlic powder and cayenne.  This ended up being the best broccoli cheese soup I have made to date.

No Knead Bread:
I've had my problems with this recipe.  Seems simple but I always ended up with a damp loaf.  So I turned to America's Test Kitchen once again.  I added beer and a little vinegar to the mix.  But I did not cook it in a dutch oven, opting for open baking on a pizza stone.  Much better flavor and texture.  As a bonus, this website encouraged me to give the dough a few turns, which I think helps with the surface tension in the loaf.

Roasted carrots, onions and sweet potatoes:
Each vegetable had its own space on a large stoneware pan, drizzled with olive oil and coarse sea salt.  After roasting they were put in their separate containers but there was some olive oil remaining on the pan.  This olive oil was a revelation of flavor from the veggies, especially the onions.  Tomorrow I am roasting onions in olive oil just for the flavored oil!

Oatmeal Scones:
From Martha Stewart years and years ago.  I omitted the dried cherries this time.  They keep in the freezer for ages and you can slice off and bake what you want fresh each occasion.  I still have about 8 scones left to bake.

No recipes to include but I can provide them if requested.